10 September 2020

Cheap energy efficient harddrives

Decisions

Every so often I'm faced with a difficult decision: Clean up my digital closet or buy more storage space. It's a good idea to sift through all the files periodically and throw out what's no longer needed but today I'm going the other route: We'll add more storage! My storage needs at home are covered by a Xpenology virtual machine running on my low power homelab server. It has served me well over the years and I don't intent to replace it anytime soon. 

For home use, I prefer backups over RAID since keeping my data is more important to me than having it always available. For this reason, the disks I use in my NAS are each set up with their own volume. Data I like to keep is copied between disks and to an offsite location by a scheduled job. I consider individual hard drives to be unreliable and have set up my backup schedule accordingly. Important data gets more copies and a higher copy frequency. Unimportant data is only present on a single disk and never gets copied. 

I don't believe I can differentiate a reliable hard drive (one that keeps working for 7+ years) from an unreliable one (one that fails in the first months of use). Therefore I consider "NAS" specific hard drives just as reliable as any other type. I just buy the cheapest one I can find and replace when needed. 

The search

When selecting a hard drive there are a number of things I consider:

  • Price
  • Capacity
  • Power consumption
  • Noise

We'll start with price since that's the least complicated factor. There are a good number of websites that compare prices between all the online shops. At €0,020/GB it seems 6TB drives are the sweet spot at the moment. They offer the cheapest storage for their price. However, external USB hard drives dive even lower at €0,016/GB for a 12TB model. So it seems I should shop for an external hard drive, then? Well, why not! 

Capacity is easy, I don't hoard data so I don't need huge capacity. I'm going to buy a single chunk of whatever is the best deal of the day.

In an always-on scenario, such as my little server that's powered on 24/7, running costs make up the biggest pile of cash needed to keep all my files available, the electricity bill needed to keep it running is higher than the initial purchase. In the search for a harddrive that makes little noise, is energy efficient and cheap, you are going to come across 2,5" models. The amount of power needed to keep a 2,5" drive spinning is significantly less (a little over one Watt) compared to a 3,5" drive (a little over 5 Watts). These models are available up to 5TBs as of now. That's enough for my needs. As every Watt of power used 24/7 costs around €2 every year, a 2,5" drive makes me lose the smallest bag of money all around.

I've tackled the noise factor at home by placing the homeserver in a padded closet. It's dead silent when I close the door. Case closed.

The sale

Searching for the cheapest 2,5" external USB drive I ended up at Amazon. They offer a Seagate 5TB model for less than 100 euro's. That makes the price €0,019/GB. Together with the low power consumption makes it good enough for me! 
The rest is well known. We found the cheapest hard drive at Amazon and no other shops. Added it to the shopping cart, clicked "Buy now" and a few days later there was a box on my doorstep.


A word of warning: Western Digital (WD) has big portable external harddrives on sale. Unfortunately some of these disks have a USB port on the drive itself (instead of a SATA-to-USB converter board). I did not want to run into this issue so I selected a Seagate drive.

Breaking stuff

A USB disk is nice and all, but usually it's a SATA disk in a piece of plastic. I have a bay available in the homeserver so I'll put in inside instead of keeping a dangling box on top. With some tools it's easy to open the plastic case. This process of liberating external USB drives from their housing is known as "shucking" a hard drive. Obviously this voids the warranty!


Insert the tool into the seam and wiggle until you hear *click* from inside. This housing is not meant to be serviced so I did not expect it to stay in one piece. 


After one round of destroying plastic clips, the hard drive is visible.


That looks like a SATA interface to me!


Removed the rubber grommets and screws.


These parts are no longer needed.

Adding the disk to XPenology works as it's supposed to. 

There's an extra disk available, creating a volume is easy using the wizard and that's all folks!

See the source image

01 September 2017

Supermicro X10SDV IPMI firmware update, iKVM over HTML5 included!!

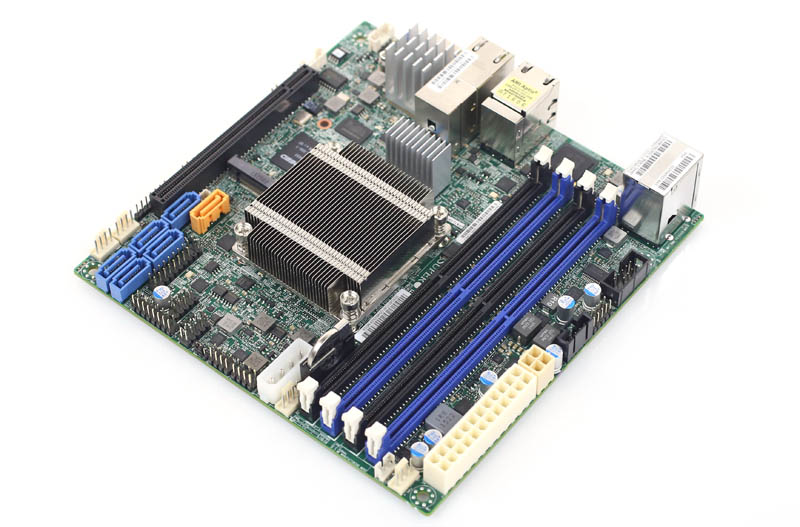
I own a homelab server based on a Supermicro X10SDV motherboard. I haven't been paying attention to the latest IPMI firmware updates lately and that's a real shame. In June, Supermicro finally released the update that enables iKVM over HTML5. You read that right, no more Java!

On the main page for my motherboard (http://www.supermicro.com/products/motherboard/Xeon/D/X10SDV-6C-TLN4F.cfm) I was able to download the fresh version 3.58 of Redfish.
Since my homelab is running Microsoft Server 2016 at the moment, installing this firmware is a breeze. In the downloaded ZIP file you'll find a simple firmware flash utility.
I simply copied the .BIN file into the utility folder and ran the executable with the right parameters (in an elevated command prompt, just to be sure). Since it's a local KCS connection, there are no authentication or network transfer issues.

The installation itself took a few minutes and after that, you will be able to use the shiny new HTML5 console!
To show you what this looks like, the picture below displays the remote console as well as the command used to update the firmware.


And before you ask: Yes, this works on a mobile device! Here are some screenshots of my Android phone using the HTML5 console.


Any reason get rid of Java is a reason for cake! I really dislike those Ask! toolbars.
So far I haven't run in to any issues so I recommend any and all users of a X10 generation Supermicro motherboard to go and check if the IPMI firmware update is available for them.

11 June 2017

Easy storage benchmark script based on Diskspd

Intro

Most of the projects I do for work have some part of storage and virtualisation in them. In order to get a good feeling for what a certain storage platform can deliver, I try to run at least one benchmark. In the past, it has been a pain to get the benchmarks right to be able to compare the results. I sometimes forget which tool I used last. The storage is not always easily accessible to the tool and some tools  end up overloading the CPU.

Diskspd to the rescue

I've been following the development of Diskspd (https://github.com/Microsoft/diskspd) with interest ever since I saw a demo in some Storage Space talk on some Microsoft conference where it was described as an internal loadtest tool meant to replace SQLIO. Diskspd is easy to use, gives consistent results and is customisable for the type of workload you're trying to mimic.
It's commandline based so it runs on almost any version of Windows (even Hyper-V server and Nano server). Being CLI based means it's easy to script and others have built great scripts to run a benchmark based on all sorts of settings.

Putting it all together

The blog post by Jose Baretto (https://blogs.technet.microsoft.com/josebda/2015/07/03/drive-performance-report-generator-powershell-script-using-diskspd-by-arnaud-torres/) really inspired me to try a more diverse approach to benchmarking with lots  of different settings in order to generate a "fingerprint" of sorts for any given storage system. This script is not meant to give an in depth view of a storage system's performance for your particular workload but will make it possible to compare different systems and their strong/weak points with a single worker and limited differentiating workloads.
In short: a great way to get a ballpark figure for a storage system.

Description of the script

The script works by asking for a few parameters:
- location to store the test file
- size of the test file (at least a few times the cache size)
- duration of each iteration (I use 60 seconds for a standard test run)

A number of parameters for the iterations are hardcoded into the script
- threadcount = the number of cores that are available to the VM/host where the benchmark is running
- queue depth = we will run all tests with a queue depth of 1, 8, 16 and 32 outstanding IOs
- blocksize = we will run all tests with a blocksize of 4k, 8k, 64k and 512k
- read/write ratio = we will run all tests with a read/write ratio of 100/0, 70/30 and 0/100
- random/sequential = we will run all tests with both random and sequential IO
- repeat = to make sure the test iterations are somewhat representative, we will run four iterations with the same parameters in a row

As you can see, this list adds up to quite a number of iterations: 384 of them. As each iteration needs 60 seconds to run, this takes a lot of time so it's not something you run during your lunchbreak. 

The last part of the script handles some formatting to get all the relevant numbers on one line (so it's easy to store as a CSV file later on) and outputs to console and file.

Related automated benchmark: VMFleet

The other tool that Microsoft released on the same Github page is VMFleet. This script launches a number of VMs and kicks off a DiskSPD worker in them. Since most hyperconverged or active-active storage solutions are able to handle multiple IO streams at once, this is a great way to (synthetically) loadtest a storage system that can handle a large number of simultaneous workloads. 

The code itself
# Drive performance Report Generator
# Original by Arnaud TORRES, Edited by Hans Lenze Kaper on 25 - sep - 2015
 
# Clear screen
Clear-host
 
write-host "DRIVE PERFORMANCE REPORT GENERATOR" -foregroundcolor green
write-host "Script will stress your computer CPU and storage layer (including network if applicable!), be sure that no critical workload is running" -foregroundcolor yellow
 
# Disk to test
$Disk = Read-Host 'Which path would you like to test? (example - C:\ClusterStorage\Volume1 or \\fileserver\share or S:) Without the trailing \'
 
# Reset test counter
$counter = 0
 
# Use 1 thread / core
$Thread = "-t"+(Get-WmiObject win32_processor).NumberofCores
 
# Set time in seconds for each run
# 10-120s is fine
$TimeInput = Read-Host 'Duration: How long should each run take in seconds? (example - 60)'
$Time = "-d"+$TimeInput

# Choose how big the benchmark file should be. Make sure it is at least two times the size of the available cache. 
$capacity = Read-Host 'Testfile size: How big should the benchmark file be in GigaBytes? At least two times the cache size (example - 100)'
$CapacityParameter = "-c"+$Capacity+"G"
 
# Get date for the output file
$date = get-date
 
# Add the tested disk and the date in the output file
"Command used for the runs .\diskspd.exe -c[testfileSize]G -d[duration] -[randomOrSequential] -w[%write] -t[NumberOfThreads] -o[queue] -b[blocksize] -h -L $Disk\DiskStress\testfile.dat, $date" >> ./output.txt
 
# Add the headers to the output file
"Test N#, Drive, Operation, Access, Blocks, QueueDepth, Run N#, IOPS, MB/sec, Latency ms, CPU %" >> ./output.txt
 
# Number of tests
# Multiply the number of loops to change this value
# By default there are : (4 queue depths) x (4 blocks sizes) X (3 for read 100%, 70/30 and write 100%) X (2 for Sequential and Random) X (4 Runs of each)
$NumberOfTests = 384
 
write-host "TEST RESULTS (also logged in .\output.txt)" -foregroundcolor yellow
 
# Begin Tests loops

# We will run the tests with 1, 8, 16 and 32 queue depth
(1,8,16,32) | ForEach-Object {
$queueparameter = ("-o"+$_)
$queue = ("QueueDepth "+$_)

# We will run the tests with 4K, 8K, 64K and 512K block
(4,8,64,512) | ForEach-Object {  
$BlockParameter = ("-b"+$_+"K")
$Blocks = ("Blocks "+$_+"K")
 
# We will do Read tests, 70/30 Read/Write and Write tests
  (0,30,100) | ForEach-Object {
      if ($_ -eq 0){$IO = "Read"}
      if ($_ -eq 30){$IO = "Mixed"}
      if ($_ -eq 100){$IO = "Write"}
      $WriteParameter = "-w"+$_
 
# We will do random and sequential IO tests
  ("r","si") | ForEach-Object {
      if ($_ -eq "r"){$type = "Random"}
      if ($_ -eq "si"){$type = "Sequential"}
      $AccessParameter = "-"+$_
 
# Each run will be done 4 times for consistency
  (1..4) | ForEach-Object {
      
      # The test itself (finally !!)
         $result = .\diskspd.exe $CapacityPArameter $Time $AccessParameter $WriteParameter $Thread $queueparameter $BlockParameter -h -L $Disk\TestDiskSpd\testfile.dat
      
      # Now we will break the very verbose output of DiskSpd in a single line with the most important values
      foreach ($line in $result) {if ($line -like "total:*") { $total=$line; break } }
      foreach ($line in $result) {if ($line -like "avg.*") { $avg=$line; break } }
      $mbps = $total.Split("|")[2].Trim() 
      $iops = $total.Split("|")[3].Trim()
      $latency = $total.Split("|")[4].Trim()
      $cpu = $avg.Split("|")[1].Trim()
      $counter = $counter + 1
 
      # A progress bar, for fun
      Write-Progress -Activity ".\diskspd.exe $CapacityPArameter $Time $AccessParameter $WriteParameter $Thread $queueparameter $BlockParameter -h -L $Disk\TestDiskSpd\testfile.dat" -status "Test in progress" -percentComplete ($counter / $NumberofTests * 100)
            
      # We output the values to the text file
      Test $Counter,$Disk,$IO,$type,$Blocks,$queue,Run $_,$iops,$mbps,$latency,$cpu"  >> ./output.txt
 
      # We output a verbose format on screen
      “Test $Counter, $Disk, $IO, $type, $Blocks, $queue, Run $_, $iops iops, $mbps MB/sec, $latency ms, $cpu CPU"
}
}
}
} 
}

14 April 2017

Pinging a subnet range using PowerShell

Every once in a while I come across a network with sub-optimal documentation. I usually want to add a new device to the network without having to hunt for a free IP address. One of the simple tests to see if an IP address is in use, is sending a ping. You can use a network scanner to ping an entire IP subnet or you can script something yourself. This is my PowerShell based script that I use in these cases:


# Ping an IP range
# based on PoshPortScanner.ps1 (https://blogs.technet.microsoft.com/heyscriptingguy/2014/03/19/creating-a-port-scanner-with-windows-powershell/)
$Net = "192"
$Brange = "168"
$Crange = 2..8
$Drange = 1..254
$Logfile = C:\users\Pietje\Desktop\ping-output.txt
foreach ($B in $Brange) {
foreach ($C in $Crange) {
foreach ($D in $Drange) {
 $ip = {0}.{1}.{2}.{3} -F $Net,$B,$C,$D
 if(Test-Connection -BufferSize 32 -Count 1 -Quiet -ComputerName $ip)
   { $ip, responding to ping >> $Logfile}
}
}
}

21 March 2017

Supermicro X10SDV CPU cooling

My homelab server uses a Supermicro X10SDV-6c-TLN4F motherboard that does not come with a CPU fan because it's meant to be screwed into a 1u chassis with its own fans. There's a low heatsink on the CPU to keep it cool using the chassis fans. The X10SDV-6c+-TLN4F does have a little CPU fan on the heatsink but was not available at the webshop where I bought the homelab server.


Silence
I did not buy myself a 1u chassis but a Supermicro Super-chassis CSE-721TQ-250B micro tower. This nice steel chassis offers a bit more storage options and thanks to the huge fan in the back, it's near silent. 

This fan is mostly there to keep the four 3,5" drivebays cool and it's placed too high on the back of the chassis to add a significant airflow over the tiny heatsink on the CPU. With all the extra space around and above the heatsink, it gets barely any cooling at all.

Heat
The low heatsink requires a lot of moving air to keep the CPU at a reasonable temperature. For example: Using no fan on the CPU heatsink means I must finish my calculations within three minutes or the CPU moves into thermal shutdown range. This makes using the little server no fun. A single Windows installation makes the CPU overheat and causes the whole server to power off. My  collegue already warned me about this before I bought the server so I knew I had to create more airflow over the heatsink.

Old stuff
Because I like pragmatic solutions, I decided to use a fan I had lying around since that's the cheapest and fastest solution. A bigger fan can move the same amount of air while making less RPM. So I grabbed the biggest PWM fan from the drawer filled with old computer stuff. It was actually a boxed cooler of some sort.


I don't remember ever owning an AMD desktop but I sure was happy to find this fan.
The attached heatsink is far to big to be mounted on the X10SDV motherboard so that had to go. Someday I may need it, so it's back in the drawer. Yes, I keep way to much junk. But look, sometimes it's very usefull to keep a heap of old stuff!

Let it fly
Having selected a big fan, there's no way to mount it on the tiny heatsink on the motherboard. I decided to add to the "front-to-back" airflow and keep some hot components near the CPU cool too. I suspended the fan in a diagonal manner, shown in the picture below.


That's right, the fan is hanging from the drivecage with two tie-wraps. Some times I fear one of the cables will end up in the blades but so far, none have. The fan pushes air around and into the heatsink and up the backside of the chassis, where it's extracted by the main case fan.

Cool and silent
So does it work? Yes it does! It keeps the CPU nice and cool and it adds some airflow over the rest of the components on the motherboard near the CPU. The NVMe SSD, BMC and the network controller get to experience a nice cool breeze.


FAN1 is the CPU fan and FAN2 is the case fan. Both are BIOS controlled and spin up when needed. I've never actually heard the fans spin up during use. Just once during testing (blowing hot air into the chassis with a hair dryer to make sure it worked).

05 September 2016

Building a vSphere lab using ESXi linked clones

Update: William Lam has posted the ultimate nested homelab deployment script. I highly recommend it! I'll leave this blogpost up for historical sake but any and all information in it has been superseeded with the script mentioned above.

--------Original post-----------
When I'm setting up a nested vSphere lab, I don't wont to spend a lot of time doing the actual setup and start playing as soon as possible. Up until now I've used the ESXi appliance distributed by William Lam. My current workflow looks like this:

  1. Import OVF to vCenter using OVF customization
  2. Boot the imported VM so the parameters get picked up by the guest OS
  3. Done!

With a simple PowerShell script it is possible to deploy the OVF, add some advanced parameters to the VMX and have a working nested ESXi after the initial boot. All in one simple "wizard" like experience.
Most of the waiting time is used to deploy the OVF itself so I thought to myself: why not shorten the time needed to set up a nested lab! And if I do so using linked clones, I get the shortest deployment time possible, since it's just a thin clone. It should be possible since the script imports the same OVF multiple times anyway. I'll try to import the OVF once, make a snapshot and use the snapshot as the base template for the linked clones. Once the linked clone is created I'll add the advanced parameters to the VMX and get the nested lab off and running! So the new workflow should look like:

  1. Make linked clone
  2. Add advanced parameters to the VMX
  3. Boot the imported VM so the parameters get picked up by the guest OS
  4. Done!

Unfortunately it's not possible to make a linked clone using the vSphere Web Client. PowerCLI to the rescue! With the cmdlet New-VM we should be able to make a new virtual machine out of an existing snapshot. So for this to work, you'll need to import William Lam's nested ESXi appliance OVA and make one snapshot. Be sure to skip all the OVF customization since we'll do that later.

After taking the snapshot, we can see the virtual machine files and the snapshot in the datastore browser. The main VMDK that contains the ESXi install itself is about 540MB large. The snapshot delta file contains no data so that's nice and small. The new clone ends up taking under 3MB. As soon as you start it up, it will grow a bit but only the new written blocks are kept in the snapshot delta file.


Since I set up most of my labs the same way, there are some entries added to the script variables that don't change between script runs. The only variable that has to be entered into the clone script each and every time is the number of nested ESXi hosts I want. This changes every time I set up a lab so I've used a Read-Host prompt for that. I mostly use VSAN or some type of shared storage for the lab, so I set the createvmfs variable to false. If I don't use VSAN, I usually set up a Starwind Virtual SAN. It's an easy to set up iSCSI target with a free 2-node license for many IT professionals. It also offers VAAI support and some storage acceleration, so that's nice.

Creating one ESXi clone takes about 30 seconds until boot. During the first boot it runs through some configuration scripts and is ready to be used in under two minutes.


Next up will be a blogpost on how to automate a vCenter deployment into this lab and a script to add the nested ESXi hosts to the fresh vCenter server. Adding all of these together should give you a quick and easy way to deploy a nested vSphere lab.

New script (for the linked clones)


 1
 2
 3
 4
 5
 6
 7
 8
 9
10
11
12
13
14
15
16
17
18
19
20
21
22
23
24
25
26
27
28
29
30
31
32
33
34
35
36
37
38
39
40
41
42
43
44
45
46
47
48
49
50
51
52
53
54
55
56
57
58
59
60
61
62
63
64
65
66
# Script by Hans Lenze Kaper - www.kaperschip.nl
# heavily inspired by William Lam - www.virtuallyghetto.com

# Variables for connecting to vCenter server
$viServer = "192.168.2.200"
$viUsername = "root"
$viPassword = "password"

# Variables for the lab host
$sourceVM = 'nestedESXi-template'
$sourceSnapshot = '20160904'
$destDatastore = 'SSD1'
$destVMhost = "192.168.2.230"
$numberNestedESXiInput = read-host -Prompt "How many nested ESXi hosts do you want to deploy?"

# Variables for the nested lab
$iprange = "192.168.10"
$netmask = '255.255.255.0'
$gateway = '192.168.10.254'
$dns = '192.168.10.254'
$dnsdomain = 'test.local'
$ntp = '192.168.2.254'
$syslog = '192.168.10.100'
$password = 'password'
$ssh = "True"
$createvmfs = "False" # Creates a Datastore1 VMFS volume on every host if true

# Actions - pay attention when making changes below - things may break #

$numberNestedESXi = (100 + $numberNestedESXiInput)
. 'C:\Program Files (x86)\VMware\Infrastructure\vSphere PowerCLI\Modules\VMware.VimAutomation.Core\VMware.VimAutomation.Core.ps1'
Connect-VIServer -Server $viServer -User $viUsername -Password $viPassword

101..$numberNestedESXi | Foreach {
   $ipaddress = "$iprange.$_"
    # Try to perform DNS lookup
    try {
        $vmname = ([System.Net.Dns]::GetHostEntry($ipaddress).HostName).split(".")[0]
        write-host "Resolved $vmname"
    }
    Catch [system.exception]
    {
        $vmname = "vesxi-$ipaddress"
        write-host "Set VMname to $vmname"
    }
    # Make my nested ESXi VM already!
    Write-Host "Deploying $vmname ..."
    $vm = new-vm -Name $vmname -Datastore $destDatastore -ReferenceSnapshot $sourceSnapshot -LinkedClone -VM (get-vm $sourceVM) -vmhost $destVMhost

    # Add advanced parameters to VMX
    New-AdvancedSetting -Name guestinfo.hostname -Value $vmname -Entity $vm -Confirm:$false
    New-AdvancedSetting -Name guestinfo.ipaddress -Value $ipaddress -Entity $vm -Confirm:$false
    New-AdvancedSetting -Name guestinfo.netmask -Value $netmask -Entity $vm -Confirm:$false
    New-AdvancedSetting -Name guestinfo.gateway -Value $gateway -Entity $vm -Confirm:$false
    New-AdvancedSetting -Name guestinfo.dns -Value $dns -Entity $vm -Confirm:$false
    New-AdvancedSetting -Name guestinfo.dnsdomain -Value $dnsdomain -Entity $vm -Confirm:$false
    New-AdvancedSetting -Name guestinfo.ntp -Value $ntp -Entity $vm -Confirm:$false
    New-AdvancedSetting -Name guestinfo.syslog -Value $syslog -Entity $vm -Confirm:$false
    New-AdvancedSetting -Name guestinfo.password -Value $password -Entity $vm -Confirm:$false
    New-AdvancedSetting -Name guestinfo.ssh -Value $ssh -Entity $vm -Confirm:$false
    New-AdvancedSetting -Name guestinfo.createvmfs -Value $createvmfs -Entity $vm -Confirm:$false
    
    $vm | Start-Vm -RunAsync | Out-Null
    Write-Host "Starting $vmname"

}


Old script (for deploying the OVF)

 1
 2
 3
 4
 5
 6
 7
 8
 9
10
11
12
13
14
15
16
17
18
19
20
21
22
23
24
25
26
27
28
29
30
31
32
33
34
35
36
37
38
39
40
41
42
43
44
45
46
47
48
49
50
51
52
53
54
55
56
57
58
59
60
61
# William Lam
# www.virtuallyghetto.com

. "C:\Program Files (x86)\VMware\Infrastructure\vSphere PowerCLI\Scripts\Initialize-PowerCLIEnvironment.ps1"
$vcname = "192.168.2.200"
$vcuser = "root"
$vcpass = "password"

$ovffile = "%userprofile%\Desktop\Nested ESXi\Nested_ESXi_Appliance.ovf"

$cluster = "VSAN Cluster"
$vmnetwork = "Lab_network"
$datastore = "SSD1"
$iprange = "192.168.10"
$netmask = "255.255.255.0"
$gateway = "192.168.10.254"
$dns = "192.168.10.254"
$dnsdomain = "test.local"
$ntp = "192.168.10.254"
$syslog = "192.168.10.150"
$password = "password"
$ssh = "True"

#### DO NOT EDIT BEYOND HERE ####

$vcenter = Connect-VIServer $vcname -User $vcuser -Password $vcpass -WarningAction SilentlyContinue
erver $vcenter -Confirm:$false
$datastore_ref = Get-Datastore -Name $datastore
$network_ref = Get-VirtualPortGroup -Name $vmnetwork
$cluster_ref = Get-Cluster -Name $cluster
$vmhost_ref = $cluster_ref | Get-VMHost | Select -First 1

$ovfconfig = Get-OvfConfiguration $ovffile
$ovfconfig.NetworkMapping.VM_Network.value = $network_ref

190..192 | Foreach {
    $ipaddress = "$iprange.$_"
    # Try to perform DNS lookup
    try {
        $vmname = ([System.Net.Dns]::GetHostEntry($ipaddress).HostName).split(".")[0]
    }
    Catch [system.exception]
    {
        $vmname = "vesxi-vsan-$ipaddress"
    }
    $ovfconfig.common.guestinfo.hostname.value = $vmname
    $ovfconfig.common.guestinfo.ipaddress.value = $ipaddress
    $ovfconfig.common.guestinfo.netmask.value = $netmask
    $ovfconfig.common.guestinfo.gateway.value = $gateway
    $ovfconfig.common.guestinfo.dns.value = $dns
    $ovfconfig.common.guestinfo.domain.value = $dnsdomain
    $ovfconfig.common.guestinfo.ntp.value = $ntp
    $ovfconfig.common.guestinfo.syslog.value = $syslog
    $ovfconfig.common.guestinfo.password.value = $password
    $ovfconfig.common.guestinfo.ssh.value = $ssh

    # Deploy the OVF/OVA with the config parameters
    Write-Host "Deploying $vmname ..."
    $vm = Import-VApp -Source $ovffile -OvfConfiguration $ovfconfig -Name $vmname -Location $cluster_ref -VMHost $vmhost_ref -Datastore $datastore_ref -DiskStorageFormat thin
    $vm | Start-Vm -RunAsync | Out-Null
}